 Mobile Menu
2009 - 2011 RX8 Gauge Pod - Wiring Senders
Article Index
Wiring The Senders
The three senders are very easy to install and here we will discuss how to install them in the order of easiest to hardest (which isn't really hard at all, just time consuming).
Oil Pressure Sender
The Series 2 RX8 engine provides us with an easy way to read the oil pressure from a small port on it's side. If you look just behind the rear trailing plug, you will notice a small hex screw that is covering a hole. Refer to the image below from the Mazda service manual
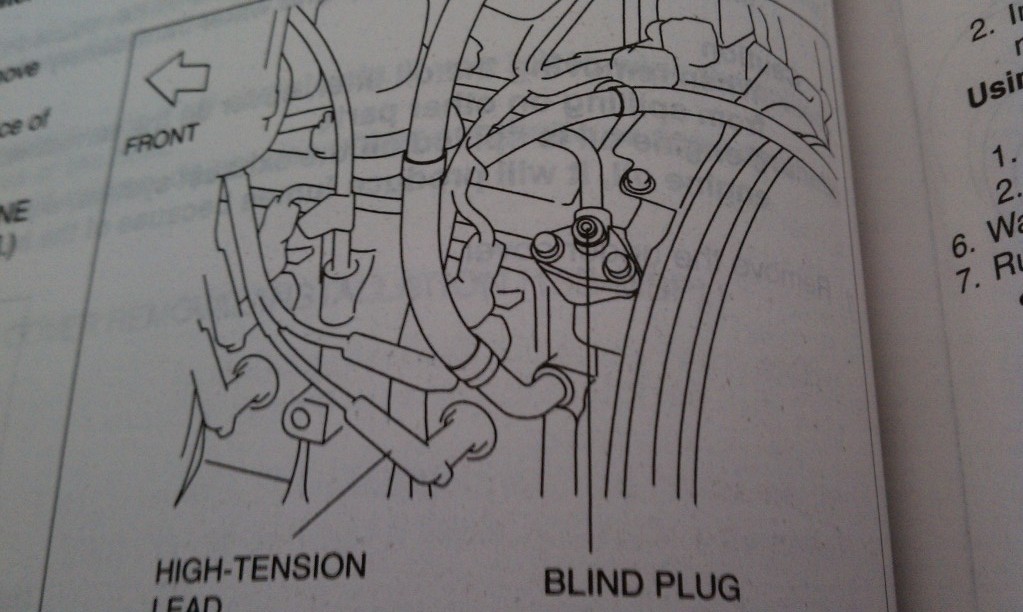
After removing the plug labeled "BLIND PLUG", you can then screw in the oil pressure sender and plug in it's wiring.
Oil Temperature Sender
Unfortunately there is no port to read the temperature of the oil, and not enough oil flows through the BLIND PLUG port to get a significant oil temperature reading, so the next best thing is to install the sender directly to the oil pan. This can be done very easily, by replacing your oil pan plug with a converter plug that converts the 1/8" size of the sender to the metric size of the drain plug.
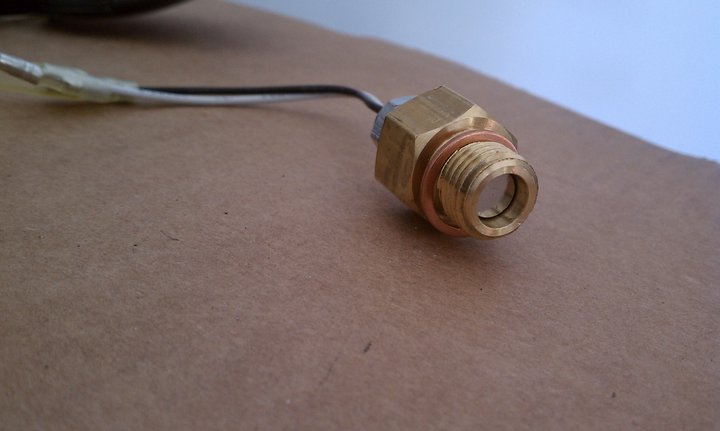
Of course this means that you are going to have to drain your oil so you can install that, but with this car, that's not necessarily a bad thing. Once you install the plug, route your sender wires down and make sure you have a nice tight connection to the sender.
Water Temperature Sender
This part takes the longest, as it will require you to first drain all of the coolant from the car from the plug underneath the radiator, and remove the battery as well as the battery cage from the engine bay. Once you have successfully done that, you will notice the coupler that is used to connect the two pieces of the upper radiator hose together. This piece is screwed into the frame of the car, so it can easily be removed.
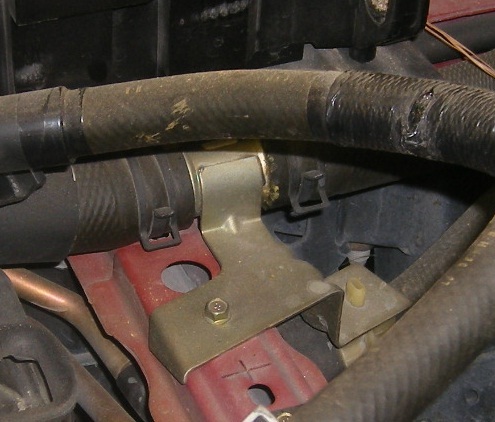
The hose clamped onto the coupler on both sides with these very strong clamps, make sure to use a pair of pliers or a specialty tool to remove the clamps without damaging the hoses. Once removed, install the water adapter with the hole facing out to the side. Next, wrap the sender's threads in some plumbers tape, and install the sender, making sure to get a nice tight install so that there are no leaks. Use the provided clamps as a replacement for the OEM ones, and ensure a tight fitment. Lastly, connect the sender wires, and reconnect the battery, you do not want to reinstall the battery supports just yet, because we want to check to make sure the sender works and the hoses aren't leaking.