Mobile Menu
RX8 Stereo Display Override
Article Index
Intro
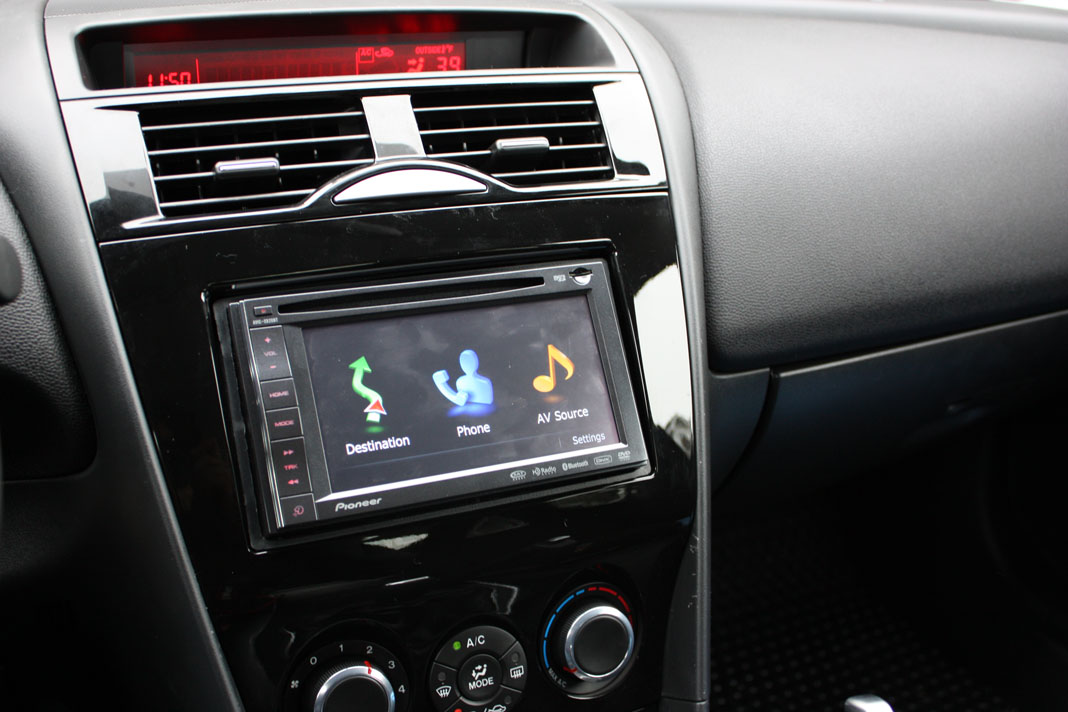
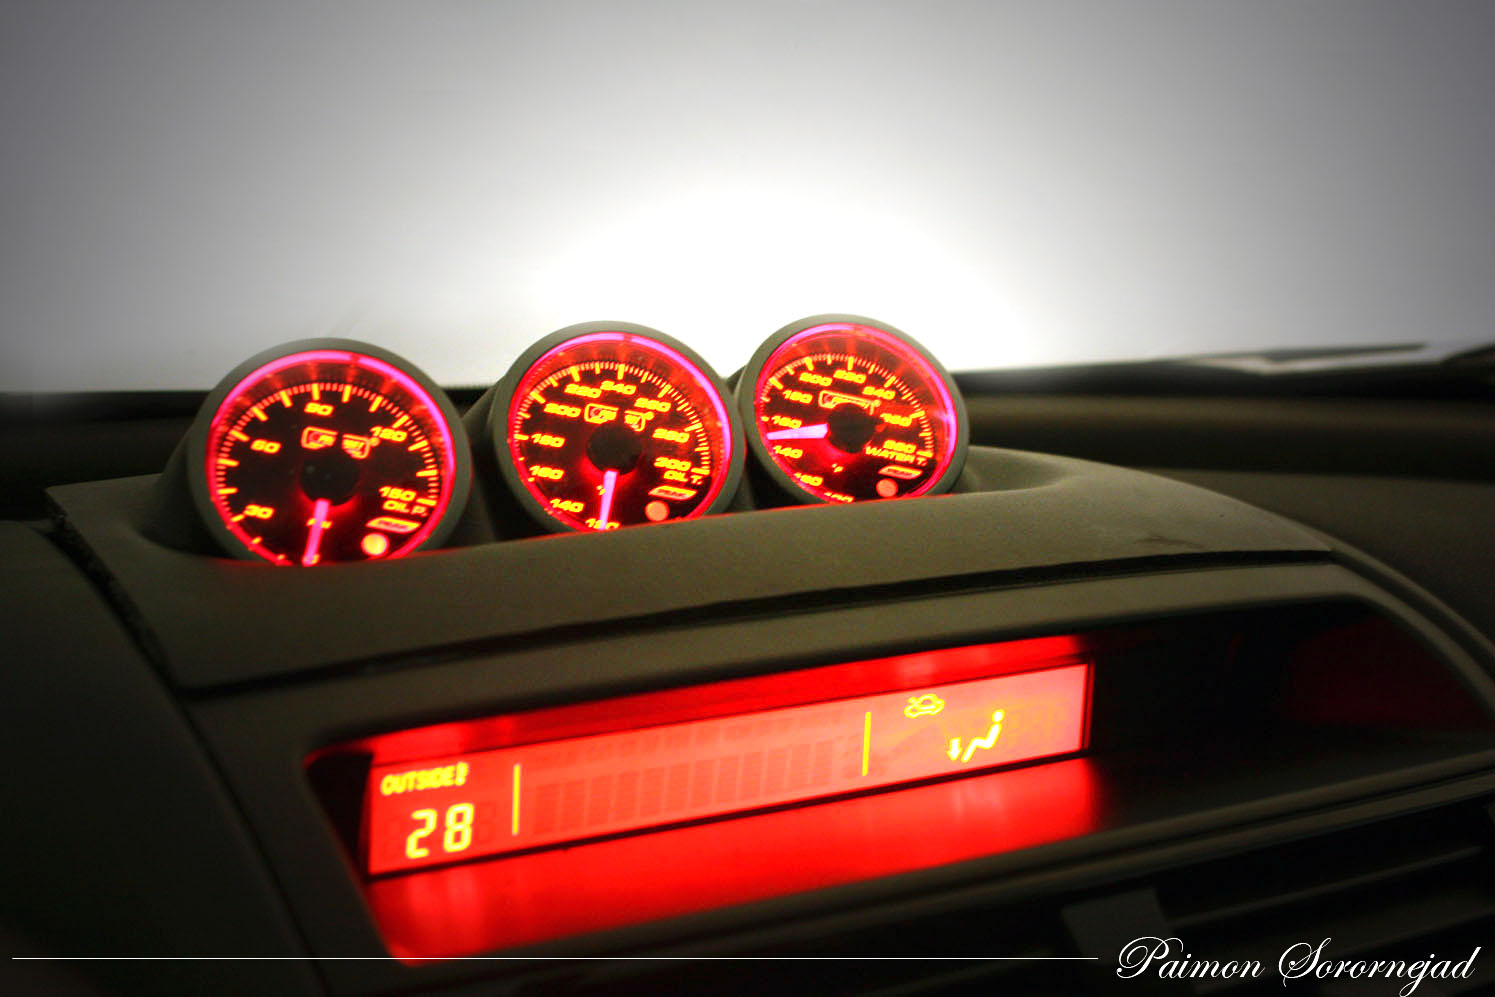
For those of us with Series 2 RX8's (2009-2011) that have replaced our stock stereos, we run the risk of losing some of the OEM functionality of the information display (MID). Once a battery reset happens, S2 owners lose their clock, and their temperature display moves to the far left of their MID. Although this may not be a big deal for some, it really bothered me, especially the fact that it would show no more than 70F. After getting my hands on some schematics, I decided to start coming up with an easy way to go ahead and set the clock. As a side project, I am working on an Arduino based solution that, if it works, I will distribute among members, but for now, this solution does just fine.
Requirements
* Stock stereo
* Open Ended OBD2 Cable
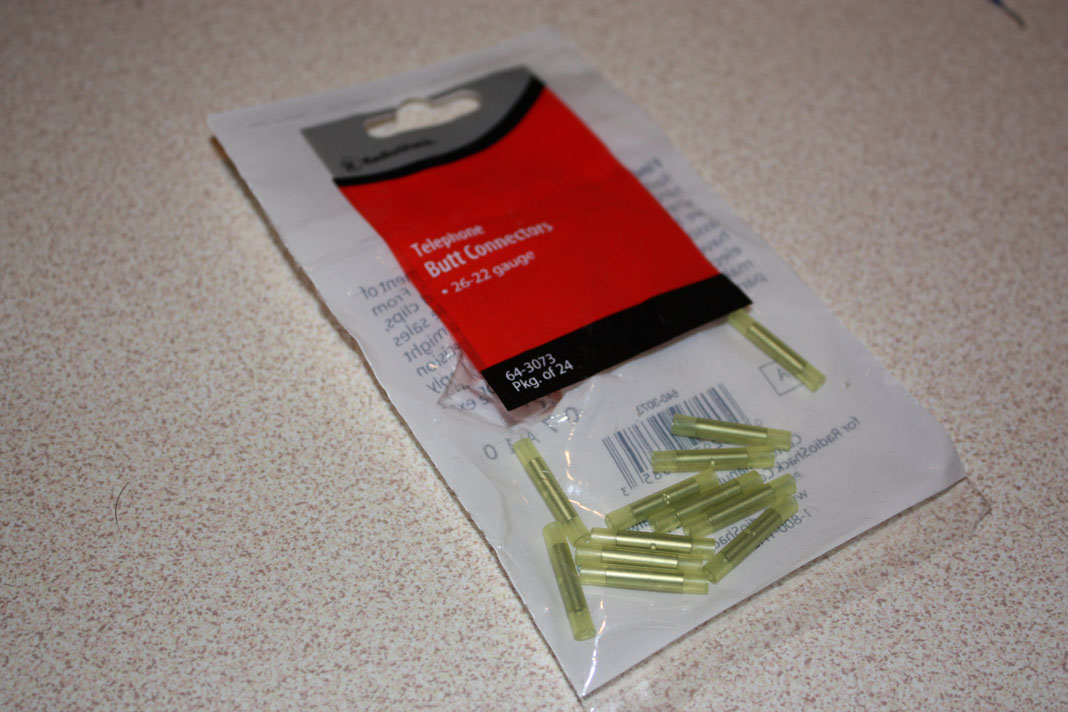
* Telephone wire Butt End Connectors
* 18 Gauge Connectors
Links To Items
* http://www.amazon.com/OBDII-Cable-J1...f=pd_rhf_p_t_1
* http://www.radioshack.com/product/in...LAID=107591898
* http://www.radioshack.com/product/in...ductId=2103510
What we are trying to resolve
Preparation
To start, we are going to need a few wiring diagrams, these can easily be found online.
The following is the audio harness for most Mazda models 2006 and up. There are only 6 pins we need to worry about.
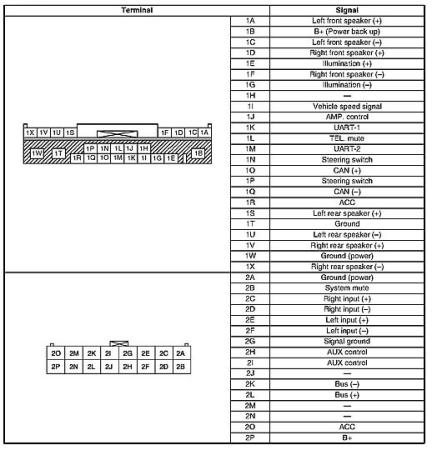
Make note of the following pins:
1. Power 1B
2. Acc 1R
3. Can + 1O
4. Can - 1Q
5. Signal Ground 1W
6. Power Ground 1T
The next schematic that we need to make note of, is the wiring diagram for the OBD2 cable that we purchased from Amazon. Please note, there is a chance that another cable will have a different wiring scheme. These wires should abide by the standard, however, double check.
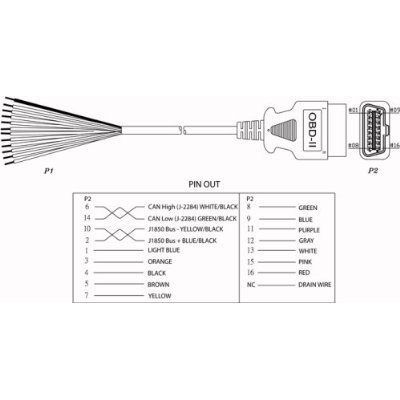
Make note of the following wires:
1. Red
2. Black
3. Orange
4. Purple
The OBD2 Wire
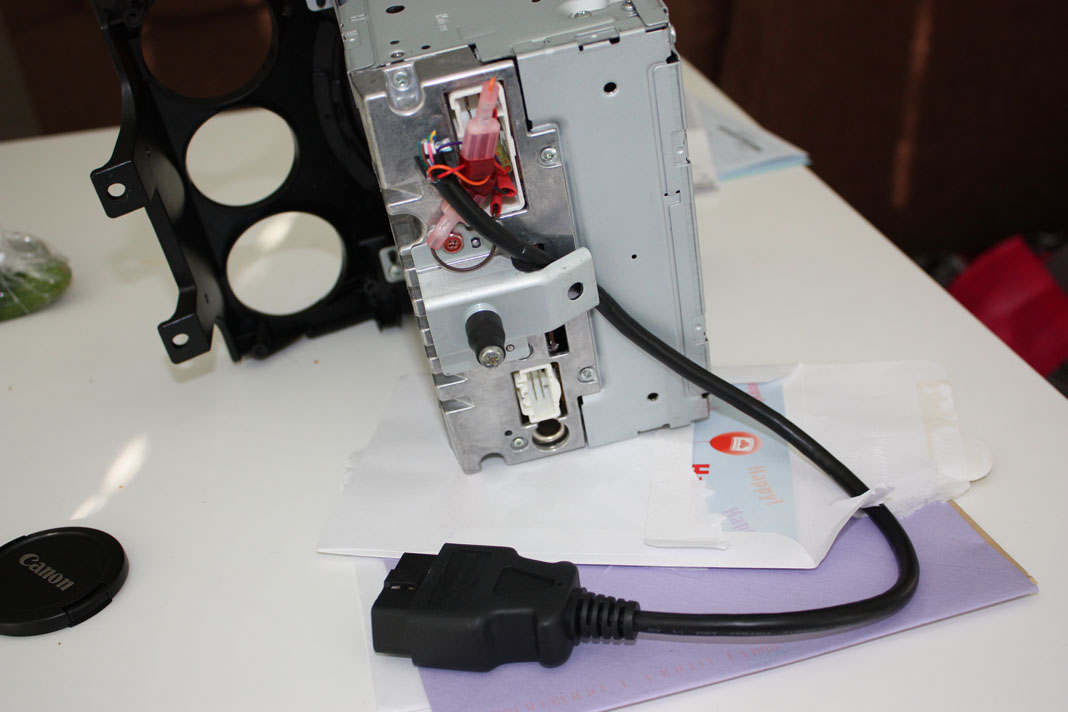
The next thing we want to do is to prepare the OBD2 wire using the butt connectors. The first thing I did, was cut down the cable from its original size, to roughly 1.5-2ft. This way I dont have a massive slack of cable to carry around. Second, I snipped off all wires that I didn't need, and only left the 4 that I had mentioned.

Once you have snipped and trimmed the wires, you want to attach a telephone butt connector to the red, purple and orange connectors. Make sure you crimp these down nice and tight.
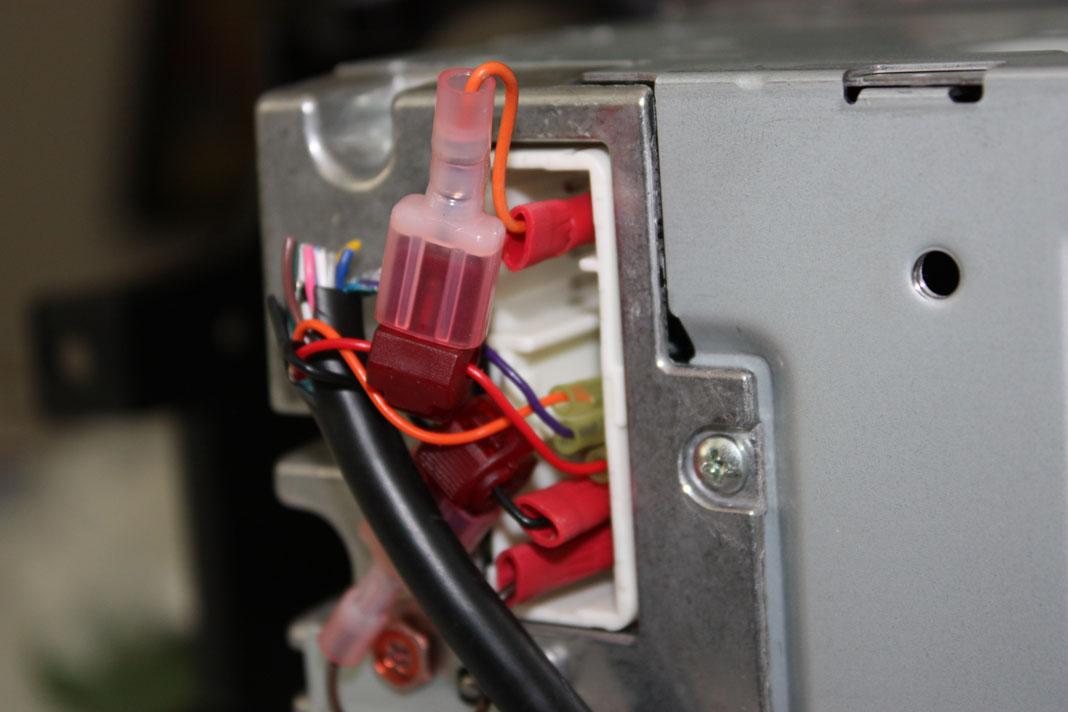
Once you have done this, you need to grab one of your 18 gauge connectors, and test fit one of the ends to the 1W location on the back of your radio. The reason you need to do this is because the pin is actually a wider pin and not a round standard pin. I had to take the end of the connector and flatten it a bit so it would slide onto the pin. Once you have done this, crimp the other end to the black wire.
Connecting To The Stereo
Now that you have your OBD2 cable ready, we are ready to hook it up to our stereo. The wiring MUST MATCH the following:
-- OBD2 -- || -- Radio --
Black || 1W
Black || 1T
Red || 1R
Red || 1B
Orange || 1O
Purple || 1Q
Note: You will see that the Red and the Black wires go to two locations. You want to use whatever method you can to do this! What I did was took a wire Tap and added an extra wire to the red and black.
Once you are done, plug it into your OBD2 port. You will hear the cd drive make some noise, as this is a normal startup noise after being unplugged. If you do not hear the noise, make sure that your ground and power are properly connected. If all is well, turn your car to ACC and you should see the clock pop up. Set your clock, then turn the ignition back to "off", and remove the cable. Now turn the car to the "ON" position, and you should now have your clock and your temp display!!