Mobile Menu
RX8 Coolant Flush
Aside from oil changes and spark plugs, another common maintenance task for
the RX8 is to do a coolant change or flush. Typical street drivers that also
see themselves on the track on the weekends will tell you that they change
their coolant every year. Although excessive, it is cheap insurance to keep
from sludge buildup in your coolant hoses and passages.
The main reason for this tutorial is to save people some time from their coolant
flush ritual. I have read a number of forum posts from people who drain their
radiator, refill, run the car for a while, drain, and refill again. This is done
to make sure to get as much of the old coolant out of the system as a bunch of it is
sitting inside the engine block. Although this works, it really takes a long time.
Many do not know, but the engine block actually has a coolant drain bolt on the center
plate of the engine block. I have looked through the factory service manual a few times
and could not find this documented anywhere, so I have taken some time to document the
location.
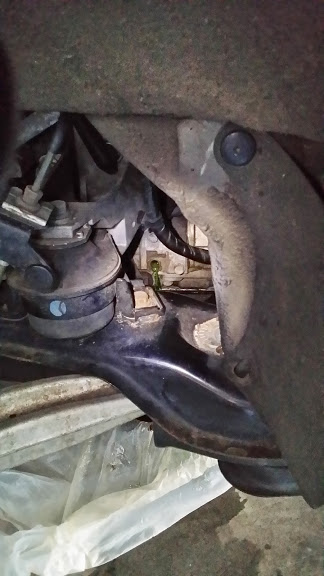
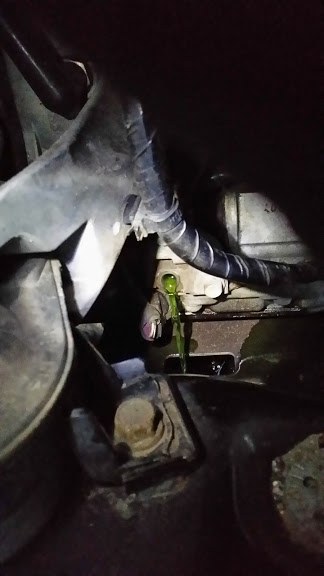
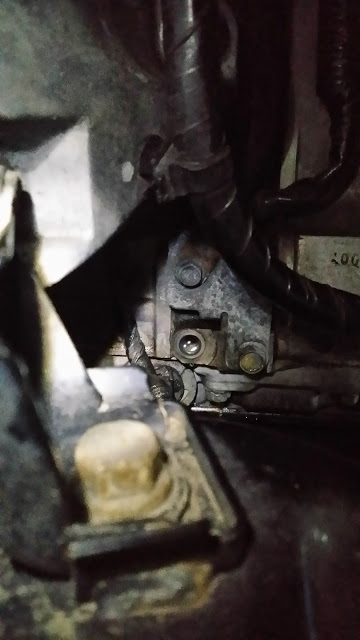
What you really want to do to get as much as the coolant out on the first pass, is to
first locate the drain bolt on the engine block itself. Don't worry about the radiator
cap right now, we will crack that open later. The bolt is a bit difficult
to find if you have never found it before, but you want to look at the center plate of
the engine block, behind the driver side engine mount.
The bolt head is sized 14mm, and it is a short bolt, so it shouldn't require a ton of
muscle to get off. Once the bolt is removed you will notice coolant start to slowly
dribble out if you haven't opened the radiator cap. If you have a helper, have them slowly
start to open the radiator cap until the coolant drains out at a controllable state if
you dont have much room and are afraid of making a mess. If you have a big enough pan to
drain into, then just go ahead and open the cap all the way to get that old coolant flowing
out fast.
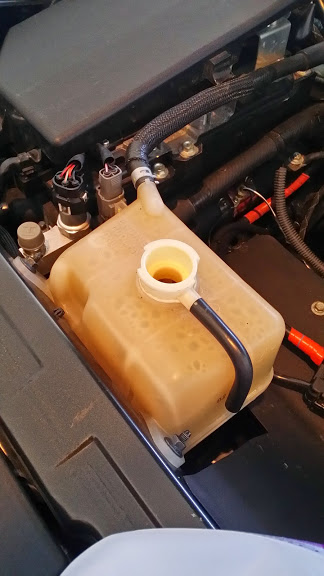
Next, grab yourself some distilled water, and keep filling the radiator separator tank until
nothing but clear water comes out of the engine. It didnt take much water for me, maybe about
a gallon.
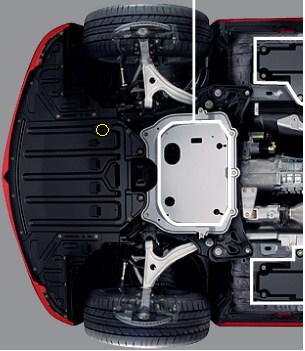
Once this is done, go ahead and clean up around the drain if you can, and replace the bolt. The
next thing we want to do, is the normal radiator drain. As pictured in the first section, the
undertray has an easy access hole to the radiator drain plug. Unscrew the plug, and let the coolant
drain out. Once the coolant is drained out, fill the separator tank with distilled water until
clear water comes out of the radiator.
Once you are satisfied with your flush, button everything back up, and start filling your cooling
system back up per normal procedure. Take note that there have been some conversation about
the use of FL22 on the Renesis, and the reasons why its chemical makeup is preferred over other
types of coolant. Again, it is your decision to buy into the topic, but I personally feel that I
rather be safe than sorry.
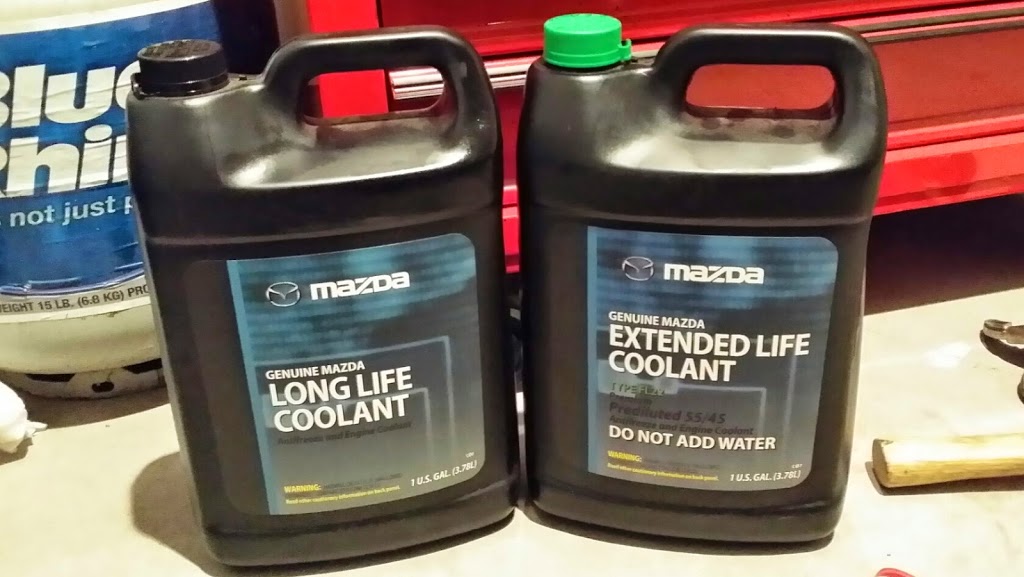
The two coolants pictured above are the same exact FL22 coolant that Mazda offers. The one on the
left however, is 100% coolant while the one on the right is premixed. The Mazda mixture is 55/45
and actually costs a lot more than buying the LLC on the left. Just buy the coolant on the left and
make your own mixture.
Once your done filling, make sure to properly bleed the system of air. My personal preference is to
leave the separator tank uncapped and let the car run so that the thermostat opens. I also run the
heat on full blast to make sure the water circulates through the heater core. Get the car's
temperature nice and hot to make sure that all of the coolant circulates and air bleeds out.
RX8 Coolant Change
Not Just From The Radiator
Engine Block Bolt
Start flushing
Button Up And Fill