 Mobile Menu
Subaru Impreza Belt Pulley Replacement
My girlfriend's Impreza has just got one step closer to it's 100k milestone. As she approached
85,000 miles, I knew it was time to start thinking about, and start performing the service requirements
that Subaru recommends. The dealership charges quite a hefty fee for this service since it is a major
level service, but in an attempt to save some money, and to create a DIY for owners who will be
considering the same in the future.
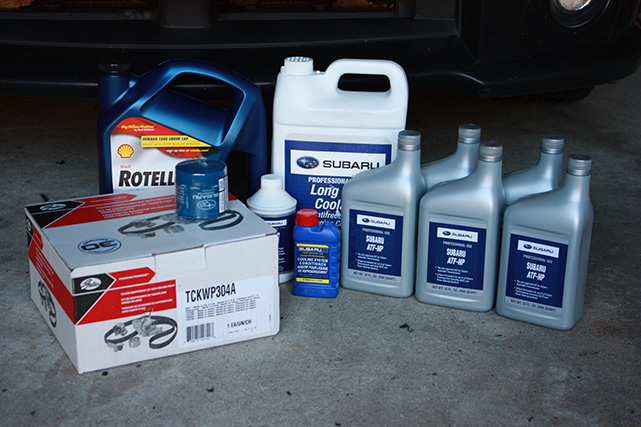
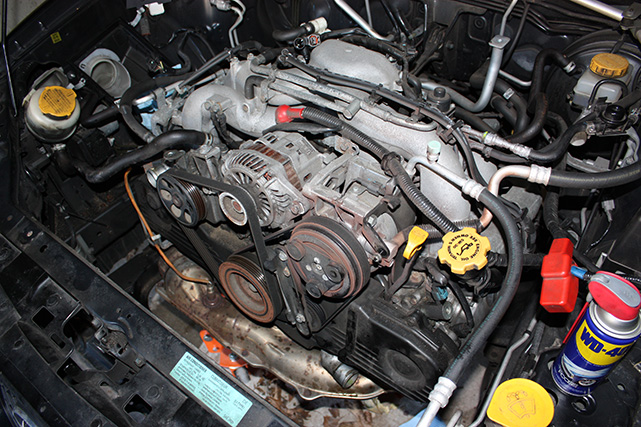
This project is pretty extensive, and in turn, requires a significant amount of
tools to make the job easier.
Note that the image above shows a few additional items like transmission fluid, engine oil, and
brake fluid. Their installation will not be covered here.
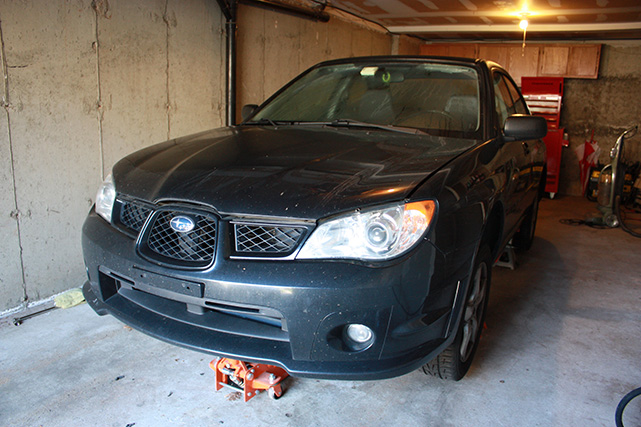
The first thing you will want to do is to get the entire car on jackstands. This will
make the job a heck of a lot easier, and you wont have to worry about clearance issues
when moving or removing components. Simply jack up the front using the crossmember jack
point, and the rear from the rear differential. Place the jackstands on the reinforced
section of the pinch welds on the side rails.
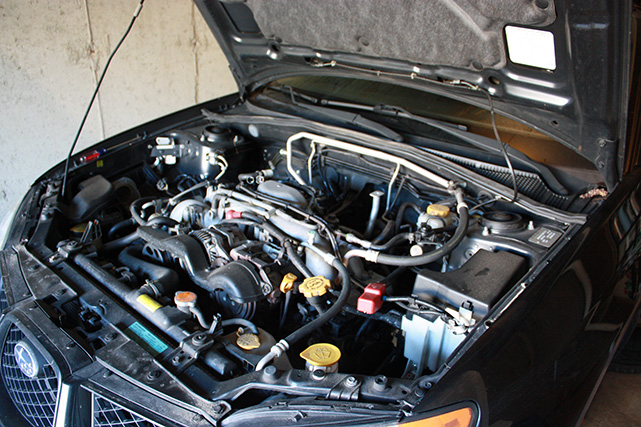
Next, you will want to remove the battery, and then the entire plastic intake system.
The battery removal will allow you to work on the car without having to worry about a
live power source getting in the way, and the intake's removal will give you access
to the transmission access port which will come in handy later.
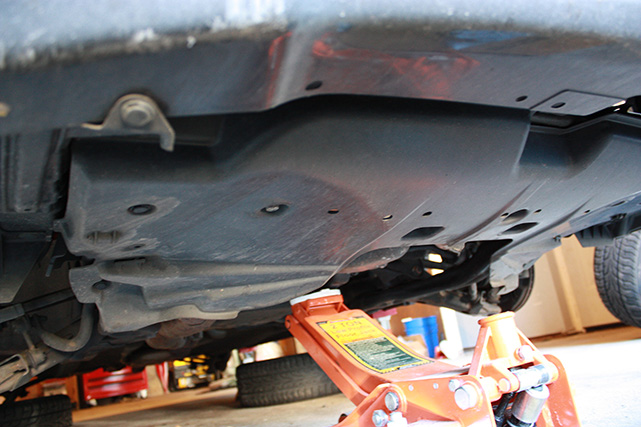
Get underneath the car and remove the plastic under tray. There are three 12mm bolts
and a few plastic buttons that hold the tray in place.
You cannot easily get access to the pullies without the removal of the radiator, so this
step is a must. Subaru provides a drain plug for the radiator on the passenger side.
Grab a bucket or a drain pan for the coolant. Throw some paper towels down or something to
prevent coolant spilling on the ground. Looking at the drain plug, you will notice that there
is room to place a hose there to direct coolant flow, but in my experience, coolant will still
spill out from around the wingnut. Don't forget to open the radiator cap to vent out air and
make the process quicker.
Next remove the radiator tie down brackets. They are held in place with 12mm bolts. Dont worry,
removing these brackets wont make the radiator fall or anything.
You will now want to disconnect the upper and lower radiator hose. They are held in place by your
typical OEM hose clamps. Be ready to catch any coolant that spills out of the hoses, especially the
lower one. Two more hoses need to be disconnected before we remove the radiator, and they are located
on the driver side of the radiator. The hoses are from the transmission so you need to be ready to
catch some smelly transmission fluid.
The orientation of the hose clamps prevented me from getting good access from the top, so I had to
remove the driver side wheel liner.
Once the hoses are disconnected, you will want to lift up the driver side of the radiator to allow for
more coolant to drain out of the passenger side drain plug. While the last bits of coolant are coming
out, disconnect the fan wires, one on each side. Once you are confident that you got as much coolant
out as you can, you can go ahead and start removing the radiator. Be careful here, and make sure that
you aren't going to get caught by the power steering system.
For anyone that has ever removed a crank pulley, they know that this is the most tedious part of any
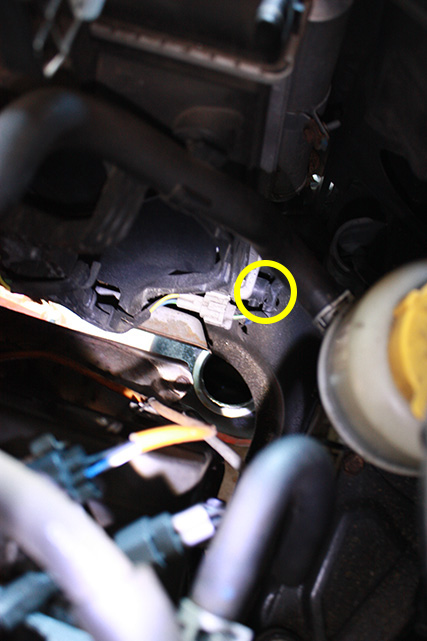
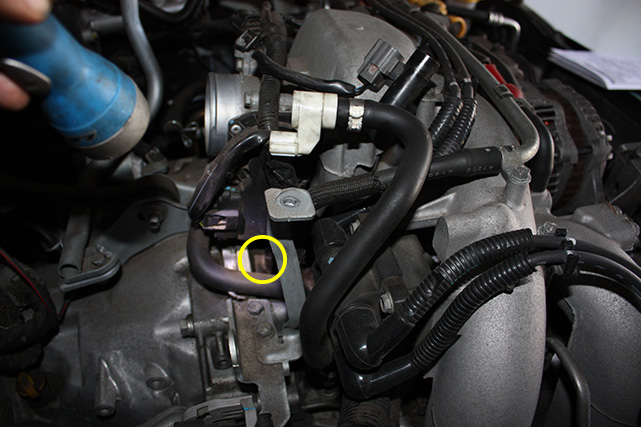
pulley maintenance. Luckily, for Subaru owners, a special access port was designed to give access to
the flex plate / flywheel. The access port can be found under the throttle body, closer to the passenger
side. It is covered by a black rubber grommet that is easily popped out with a screwdriver.
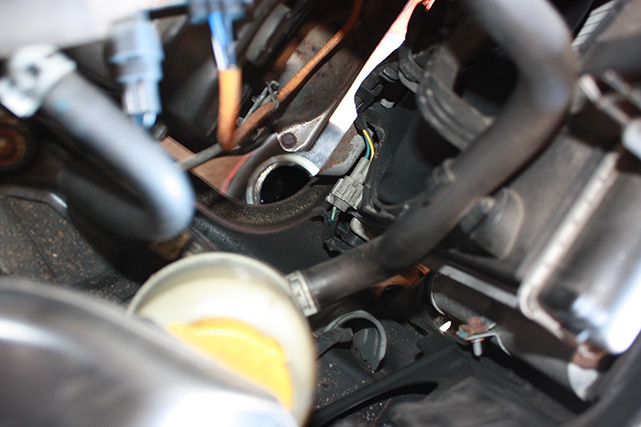
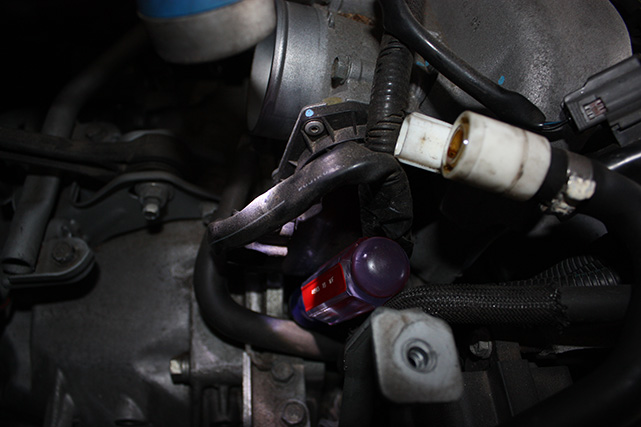
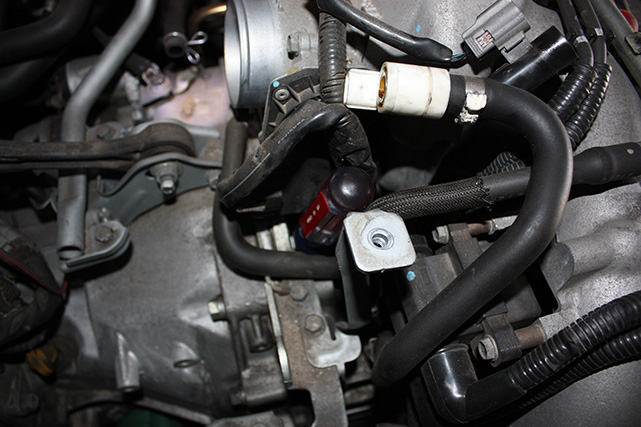
Go ahead and remove the grommet, and take a look inside. You should see an opening for a screwdriver
or something to push through. If not, you may need to turn the crank a bit until you see the opening.
Slide a flathead screwdriver through, making sure that it is clear of any lines or plastic pieces.
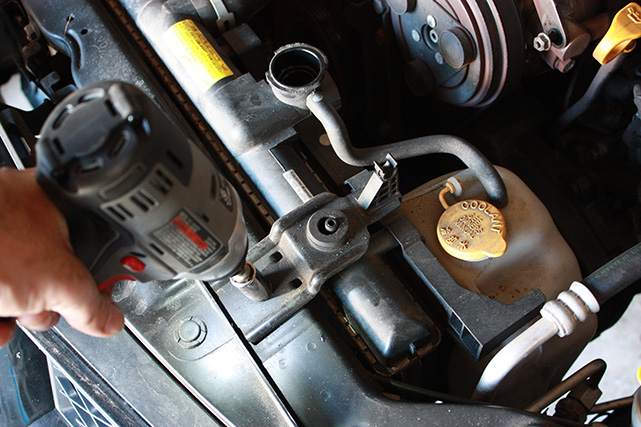
Now that the screwdriver is in place, you should be able to break free the crank pulley. Grab yourself
a nice long breaker bar, and a 22mm socket, and put some muscle into it.
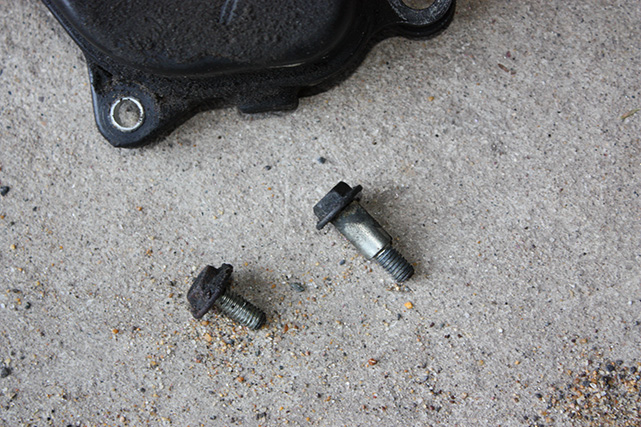
Next, remove the alternator/power steering pump belt, and the AC compressor belt, and remove the AC belt
tensioner pulley. This is held in place by two 12mm bolts.
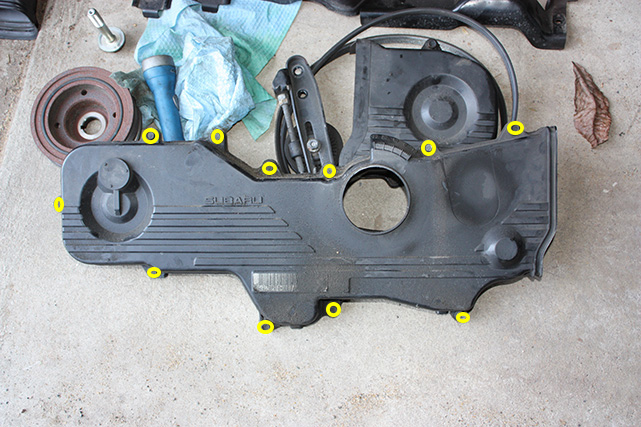
You can now remove the plastic timing belt cover. Start by removing the driver side since it is a small
piece and it overlays the longer passenger side piece and is only held in by three 10mm bolts. The larger
piece has a lot more bolts to deal with, and the picture below helps highlight the locations of these bolts.
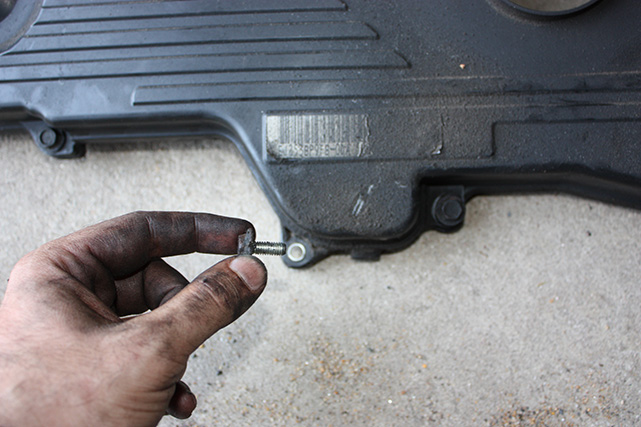
There is one thing to take note of that you will want to remember for reinstallation, and that is the size of
one of the bolts on the larger timing cover. At the very bottom of the cover is two bolts, and one of the two
is different than the rest. The pictures below help illustrate
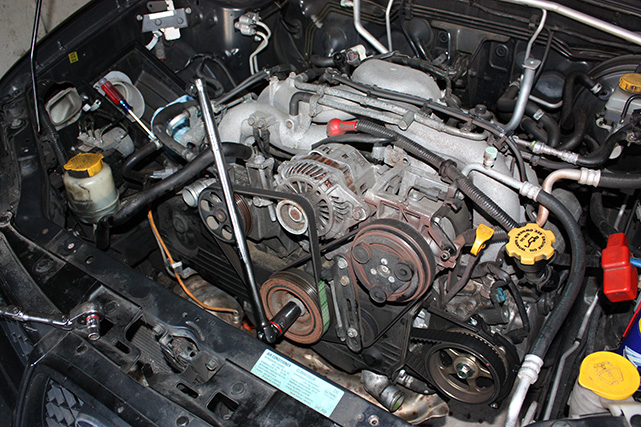
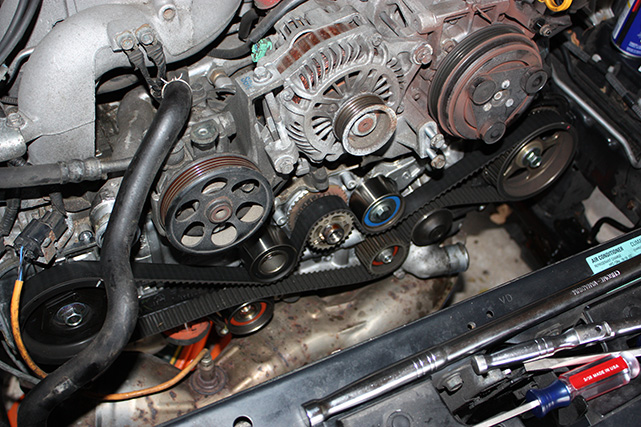
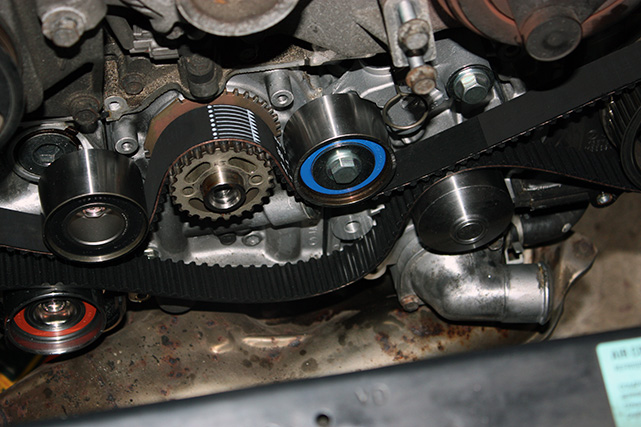
With the cover removed, you can now get a glipse of what the timing belt setup looks like on the car.
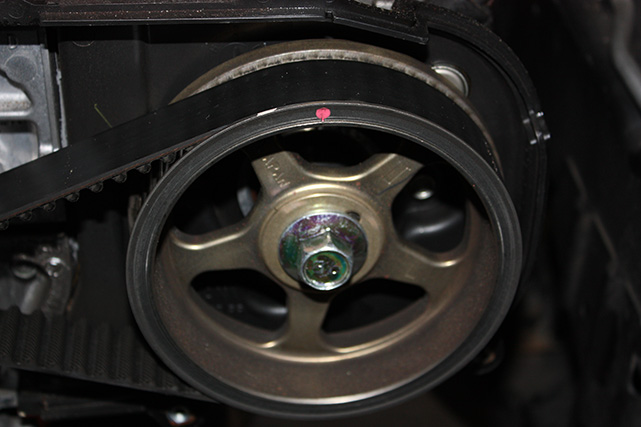
Before removing the timing belt, you want to make sure that the crank and cams are properly oriented so that the
installation of the new belt will be more precise. To do this, simply rotate the crank until the markings on all
three pullies are facing upward.
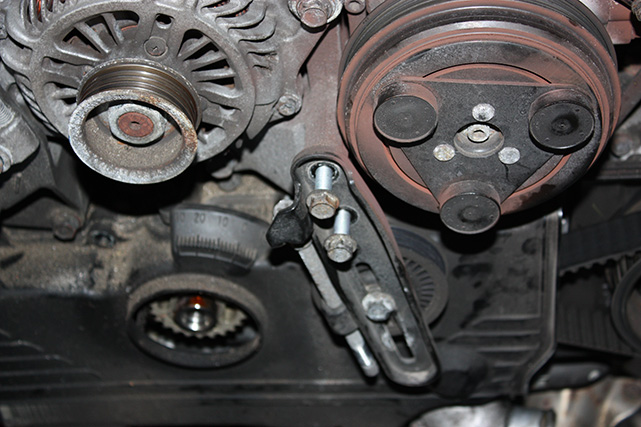
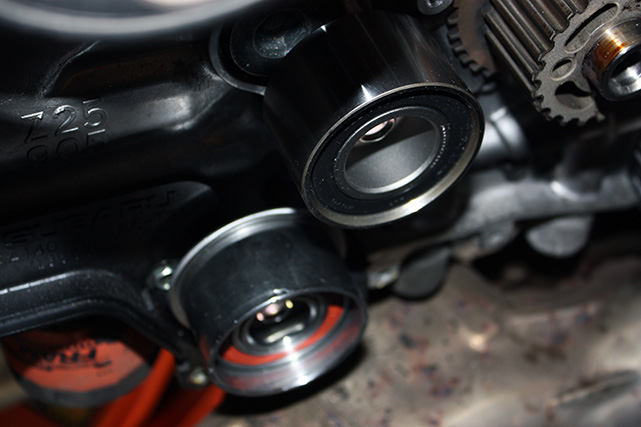
Now you can go ahead and remove the timing belt. To do this, you need to relieve some slack in the line, and you can
do this by removing one of the two guide pullies. I chose the one with the teeth at the bottom right of the system.
With the belt removed, you can now remove the auto tensioner pully.
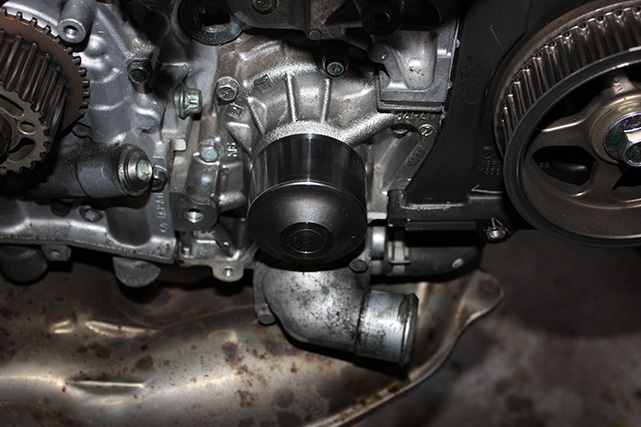
If you ordered the Gates kit that i listed above, you should have got a brand new water pump assembly. Subaru recommends
this part replaced at the 90k mile service interval, and since you are already removing all the belts and pullies, it makes
sense to just get it done at the same time. Theres 6 or 7 10mm bolts holding the water pump into place. Be aware that once
you break open the seal, coolant will start spilling out.
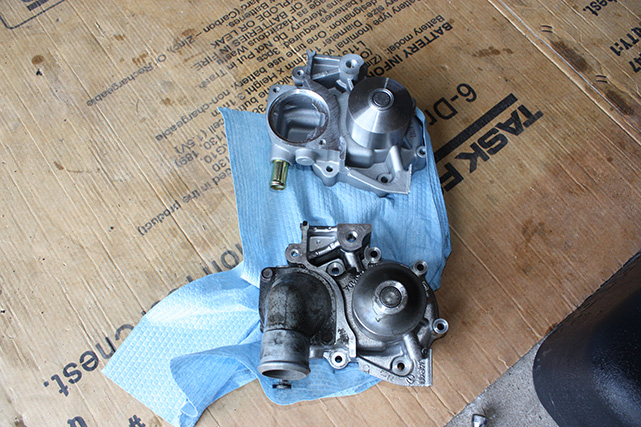
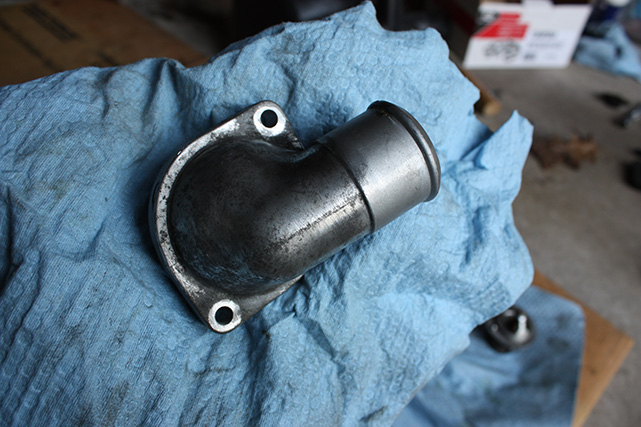
The new water pump doesn't come with the thermostat housing or the thermostat, so you will need to transfer it over. The
housing uses 2 10mm bolts
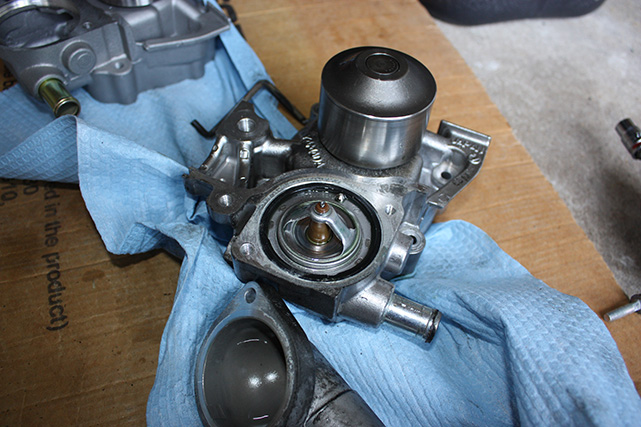
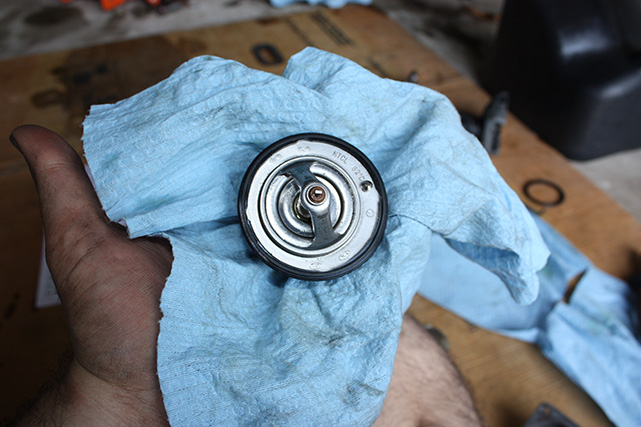
Chances are that the thermostat is packed in there pretty tight thanks to the old rubber seal. You can go ahead and gently break
the seal with a sharp knife, and it should open it enough that you can pull out the thermostat.
Go ahead and clean up the thermostat outlet housing, and inspect the thermostat for any wear or damage. It is recommended to replace
the thermostat when doing this instead of reusing the old one. Take note that a new thermostat doesn't come with the kit.
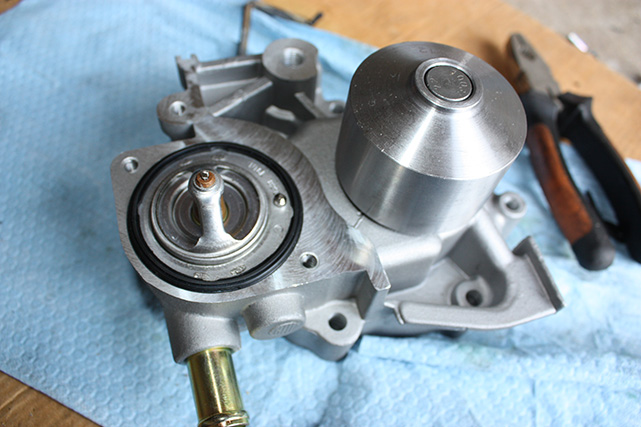
Make sure to install the rubber seal that came with the new kit around the thermostat.
Now you can go ahead and install the thermostat into the housing. Take note of the orientation of the thermostat. The wider edge should
be closer to the pump pulley, and the narrow edge closer to the side of the pump.
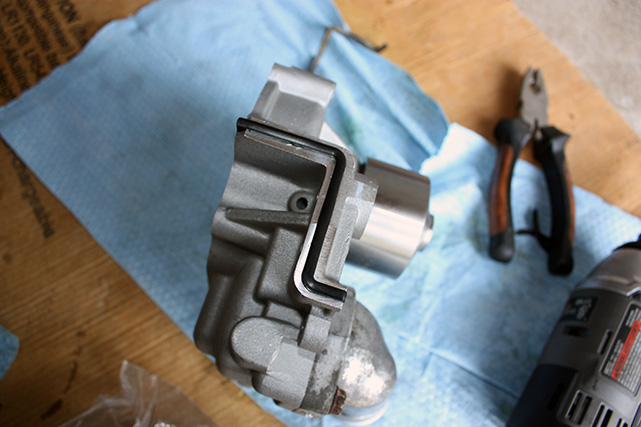
Dont forget about installing the rubber seals on the side of the pump. New ones should have come with the Gates kit. Go ahead and use the
new waterpump gasket, and reinstall the waterpump.
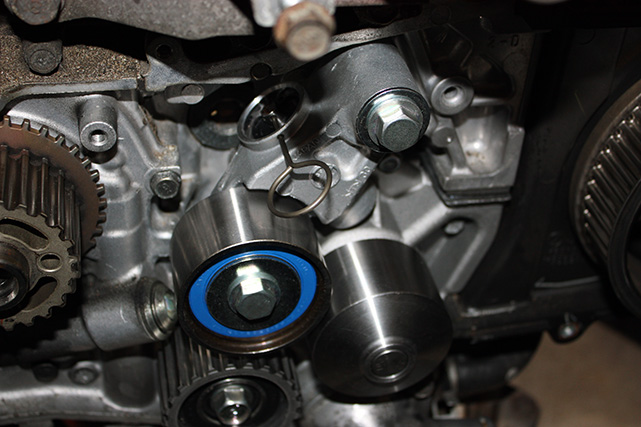
The kit comes with brand new guide pullies, so you can go ahead and install these now. Take note of the picture, the two pullies are different
so take care to install the correct one in the correct position. Torque these pullies down to 30ft/lbs.
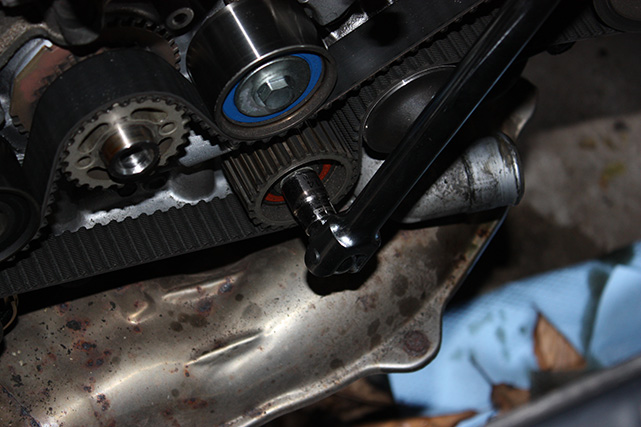
Next, you will want to go ahead and install the auto tensioner pulley. Take note of the tensioner pin, DO NOT pull this pin out
just yet. Just go ahead and install the tensioner, and torque down to 30ft/lbs.
There is one more guide pulley to be installed, it is the toothed pulley in the kit. We will save this one until after the belt has been put in
place to make the install a bit easier.
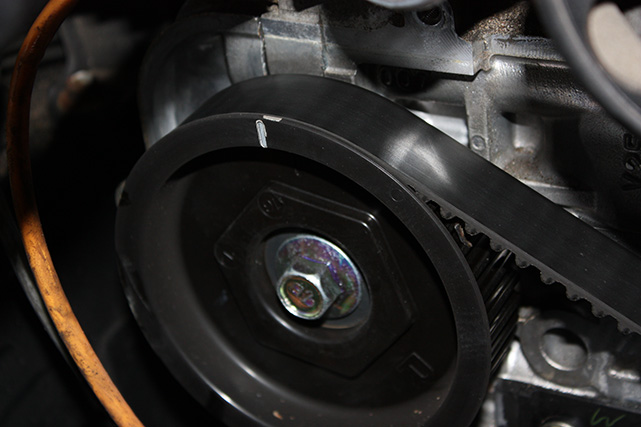
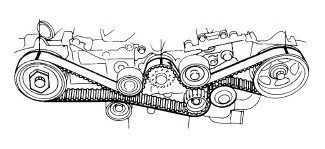
Installing the new belt takes some great care, and when we do the install we must make sure that we DO NOT move any of the cam
pullies or the camshaft pulley. Please remember this as it can cause catastrophic damage to your valves. With the new belt, you
want to locate the "dotted" line with the arrows. The dots on the belt shold be aligned with the cam indicator, with the arrows pointing right.
Take note of the following diagram.
Following the diagram above, start by fitting the belt over and around the pullies. It is recommended to go counter clockwise when installing the belt
because the adjusters are on the right hand side of the engine. Again, be careful not to move any of the cam pullies.
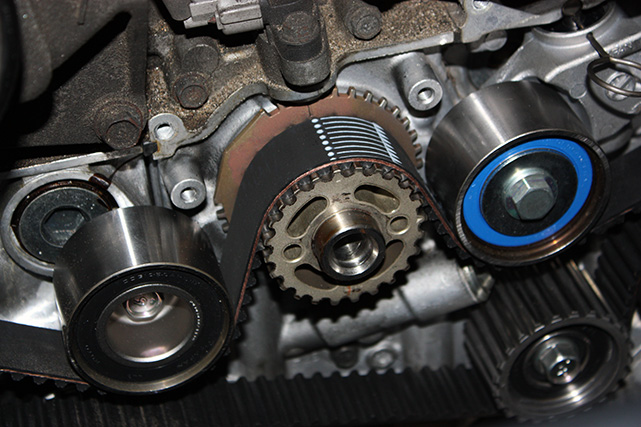
You can see in the image above that we are left with significant amount of slack. This is the location where the new tooth guide pulley will go, and
you will want to go ahead and install this now. It will take some wiggling to get the pulley in place properly because of the lack of slack in the new
belt. Just take your time, and if possible, get an extra helping hand. Once you get the belt installed, you can now go back and pull the pin from the
auto tensioner.
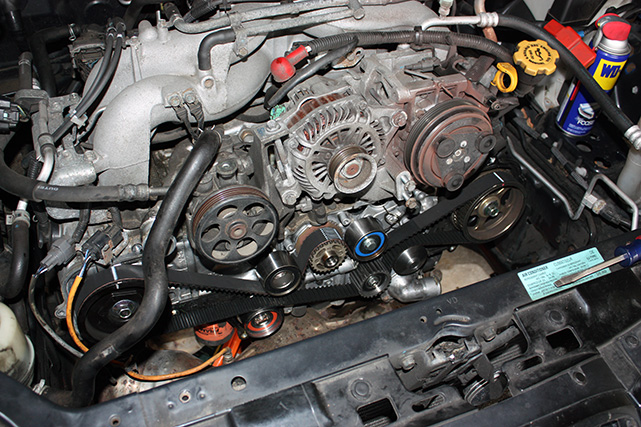
At this point, we want to work on reinstalling everything. Make sure that the timing cover is nice and clean, and start by reinstalling the larger left
hand side of the system. Again, remember that there was one bolt that was different from the rest. Go ahead and install the crank pulley torqued down to
130ft/lbs, the accessory drive belts, and tensioners.
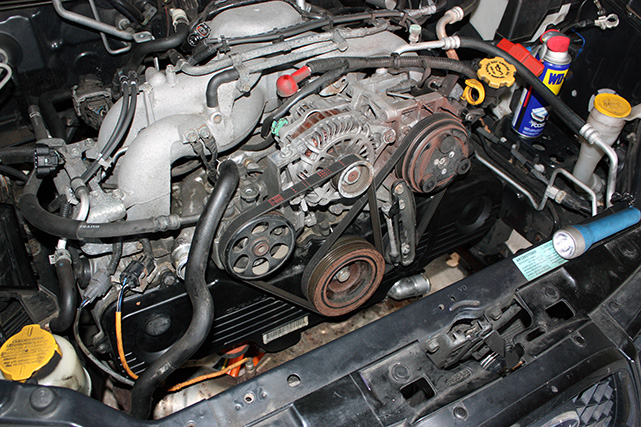
Reinstall the radiator system in the reverse order making sure that all of the hose clamps are installed properly and firmly, and making sure that the
transmission fluid lines are properly reinstalled. Don't forget to clip the fan lines in, and make sure that the radiator drain plug is closed. Add
the Subaru Coolant Conditioner, and a 75/25 mixture of distilled water to Subaru Coolant (higher coolant concentration if you live further north). Reinstall
the intake system, and the battery.
In my case, I had the rest of the service requirements to perform, so I didn't get to turn on the car at this point. But if the belt/pulley install is all
your task entailed, then at this point you can go ahead and turn on the car and burp the lines. To do this, leave the radiator cap off, and turn on the vehicle.
If your belt install went well, your car should fire up without a hitch. Your car may idle a bit rough at first, but remember that fuel trims need to be relearned
since the battery was disconnected.
You now want to turn on the heat on high and hot, and turn on the AC button. What this does is that it will get coolant into the heater core and help further bleed
the coolant system of air. While the car is idling and warming up, head back to the front of the car and monitor the radiator filler neck. You want to keep topping
off the fluid. Eventually the thermostat will open up, and the coolant level will significantly drop. Keep adding your mix of coolant/water and topping off until the
level of fluid no longer changes. This process takes some time as you need to get the car nice and warm. You can help expedite the process by tapping on the rubber hoses
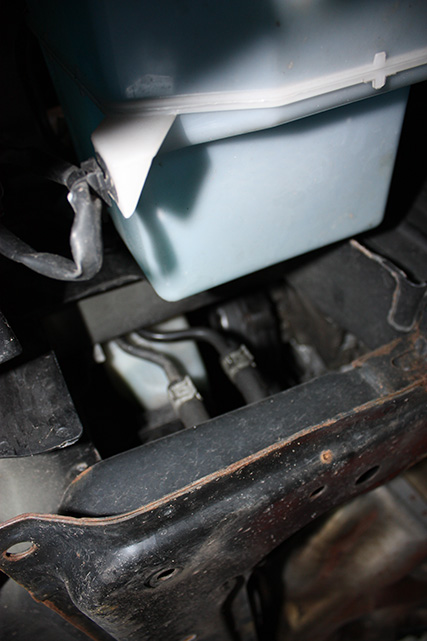
or gently squeezing them to "burp" them. Once you are confident that the air is bled from the line, you can reinstall the radiator cap. Now fill the coolant expansion tank
(the plastic tank to the right of the radiator) to the "Low" marking.
Congrats! You just performed a belt install and pulley replacement for your Scooby. Hopefully you found this DIY helpful.
Subaru Impreza Belt and Pulley Replacement
Requirements
Getting Started...
Removing The Radiator
Removing The Crank Pulley
Timing Belt Removal

Water Pump Replacement
Installing the New Guide Pullies
Installing the New Belt
Reinstallation
What's Next...